Monitoring
Sunsynk battery monitoring is easily accessible via the Sunsynk Connect and Sunsynk Connect Pro Cloud apps. Sunsynk inverter systems use the CANBUS protocol to maintain continuous communication with connected batteries. To enable monitoring of battery functionality and performance, a data logger must be properly connected to the inverter and to WIFI, and a site plant must be created via the Sunsynk Connect or Sunsynk Pro Cloud apps. For detailed instructions on the Sunsynk Connect or Sunsynk Connect Pro Cloud App and setting up system monitoring, refer to the Sunsynk Connect or Sunsynk Connect Pro User Manual on sunsynk.org
The following illustrations show how to register, create a plant for a site and monitor a battery online with ease.
Data Logger Installation
1
Insert the Data Logger into the DB9 interface of the inverter, as shown in the following figure.

2
Insert the two screws that come with the Data Logger trough the holes, and then tighten them with a Phillips screwdriver, as shown in the figure below.

Connecting to Wi-Fi
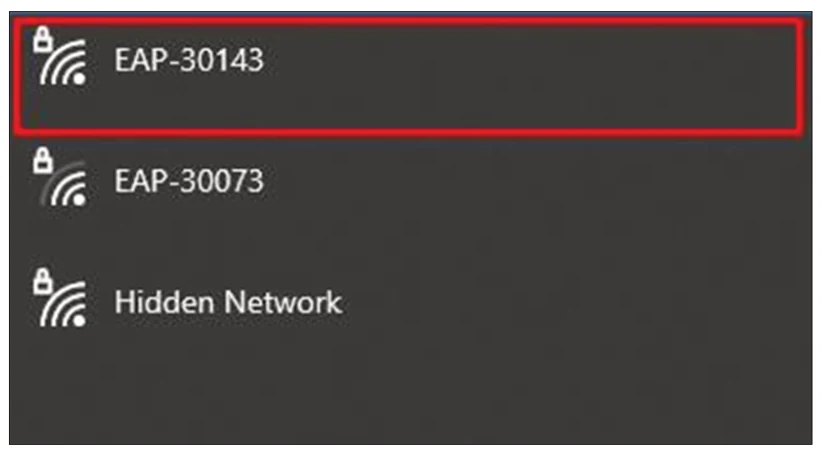
To connect the data logger to the Wi-Fi you need to go to the Wi-Fi setting on your device and search for it. You will see an available connection with the SSID ‘EAP-*****’ (‘*****’ are the last 5 digits of the serial number on the data logger).
1
Select the correct connection and then enter the password 12345678.

2
Once you have connected to the EAP connection, you need to connect it to your own Wi-Fi. To do this, open the Internet browser and search the IP address 10.10.10.1.

3
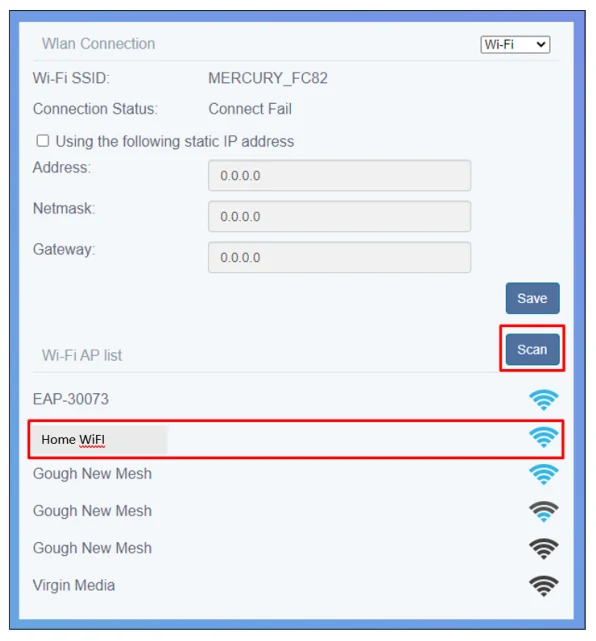
Once connected, click ‘Scan’ to search the Wi-Fi List and you should then see your Wi-Fi connection.
4
Select your Internet / Wi-Fi connection, enter your password, and click ‘Connect’.
5
Once your data logger is connected to your Wi-Fi, you can then disconnect from the data loggers EAP connection and connect back to your usual Wi-Fi connection.
Network Cable
1
Use a flat-blade screwdriver to press the buckles on the left and right sides of the shell, as shown in the following figure. Then extract the DB9 interface part manually.

2
Pass the network cable through its specific hole at the bottom of the shell. Then, insert the RJ45 plug into the RJ45 socket, and place the sealing plug with the hole on the network cable, as shown in the figure below.

Registration
2
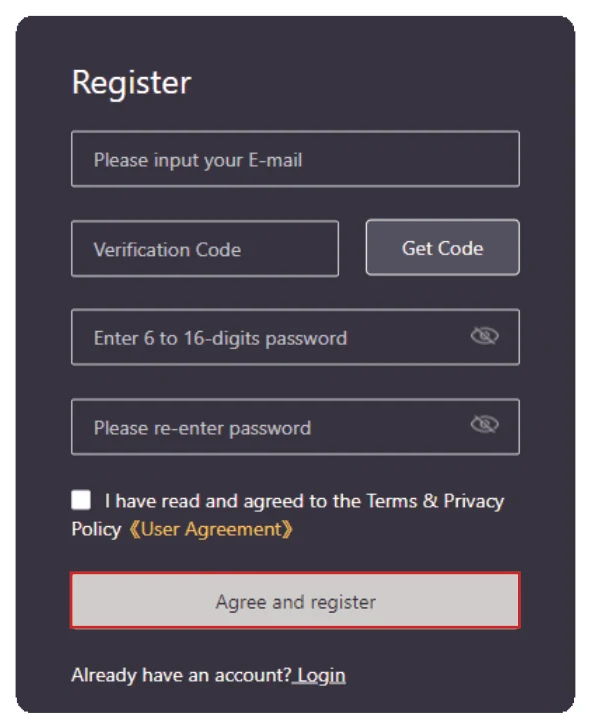
Enter a valid email address to receive a verification code. Complete the registration form by setting a password, checking the user agreement box to confirm agreement, and then click ‘Agree and Register’.
1
Visit https://sunsynk.net in your browser to access the web version of the management tool. Click on ‘Sign Up’ on the Login page to proceed to the Registration page.

Requesting User Level Access Change
If you are an installer who has registered on the Sunsynk Connect platform, you may initially have a basic user account with limited permissions. To request elevated user access for parameter changes, remote inverter upgrades, and other functions, please visit https://www.sunsynk.org/remote-monitoring and complete the form provided.
1
Creating a Plant
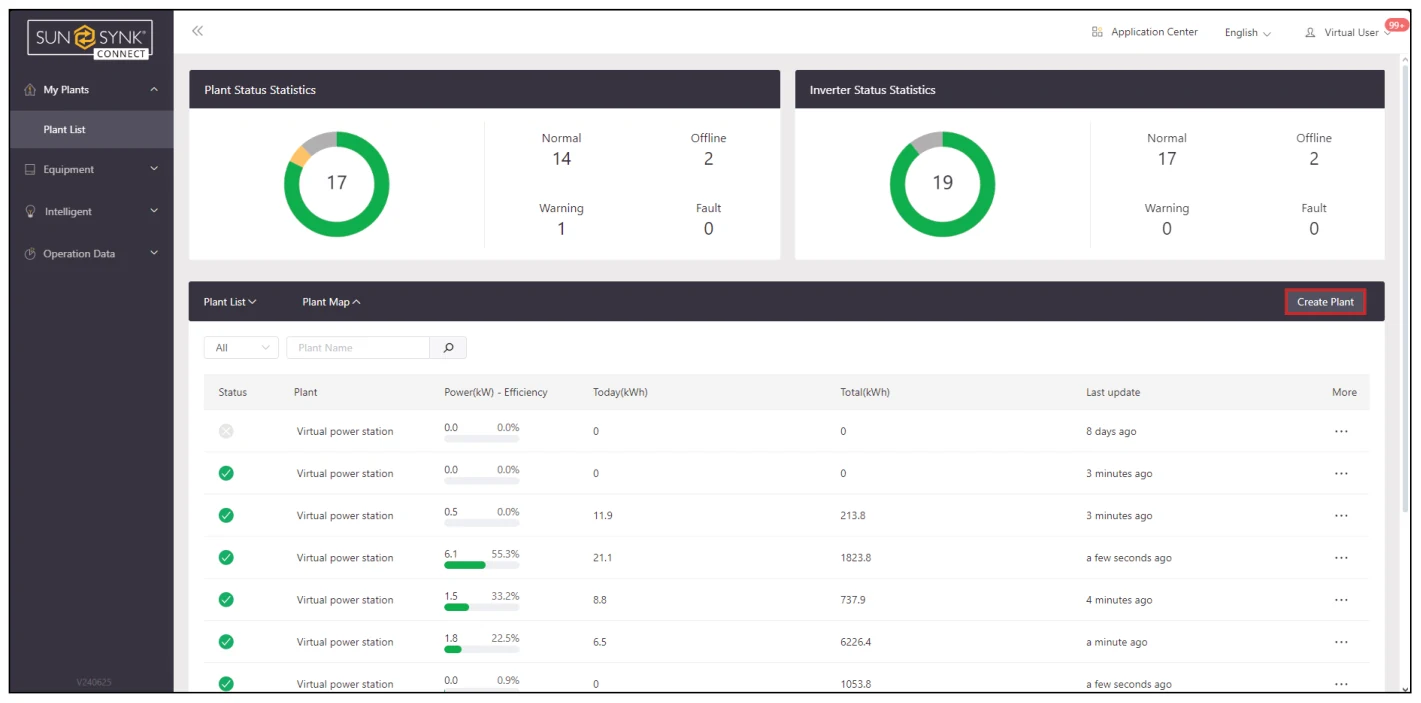
Navigate to the menu and click on ‘My Plant’, then select ‘Plant List’.
2
To initiate a new plant setup, click on ‘Create a Plant’ located in the right of the page.
3
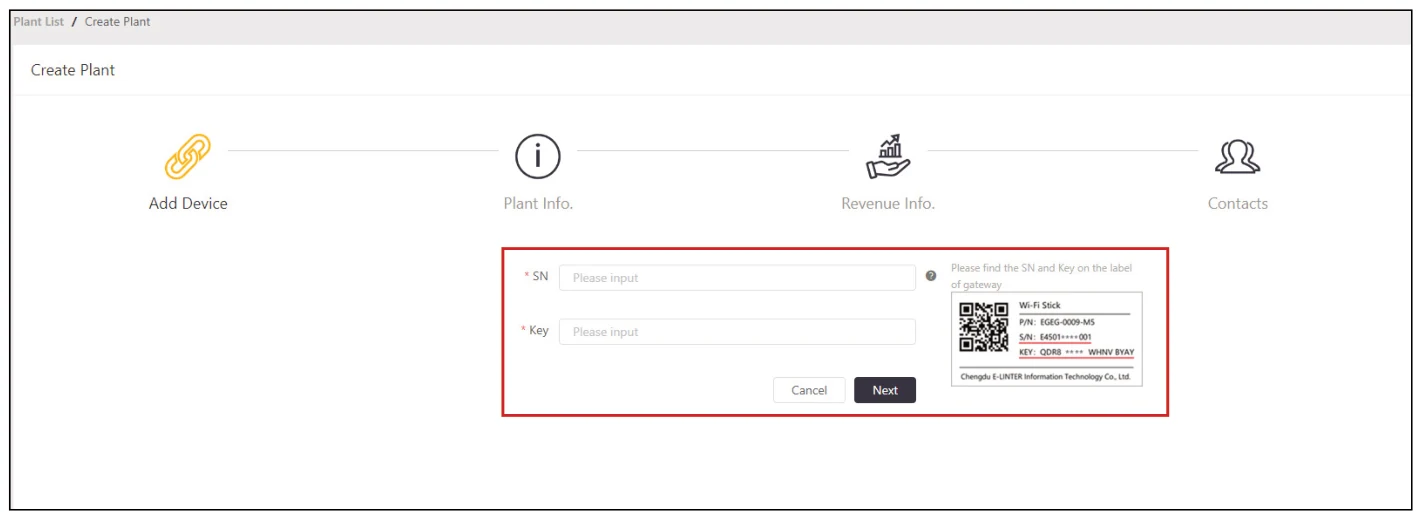
Enter the Serial Number (SN) and KEY from the Data Logger label, then click ‘Next’.
5
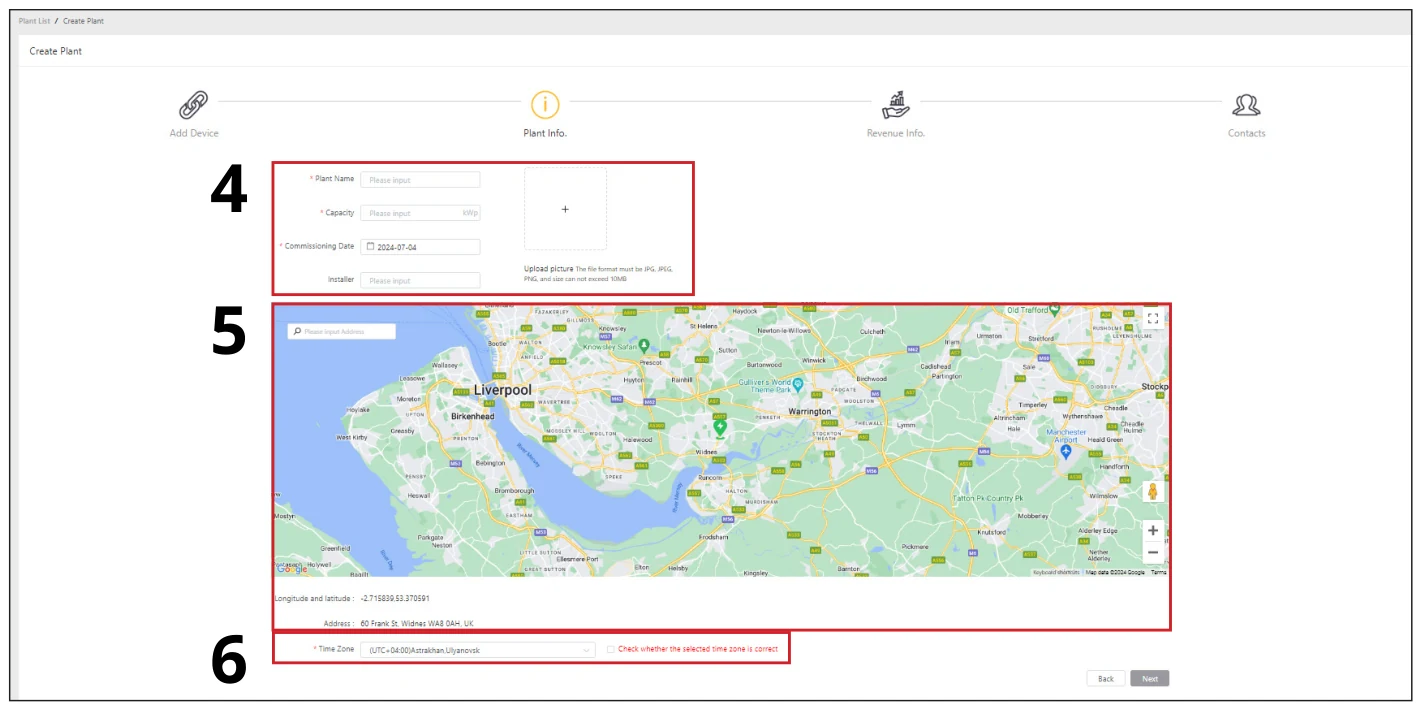
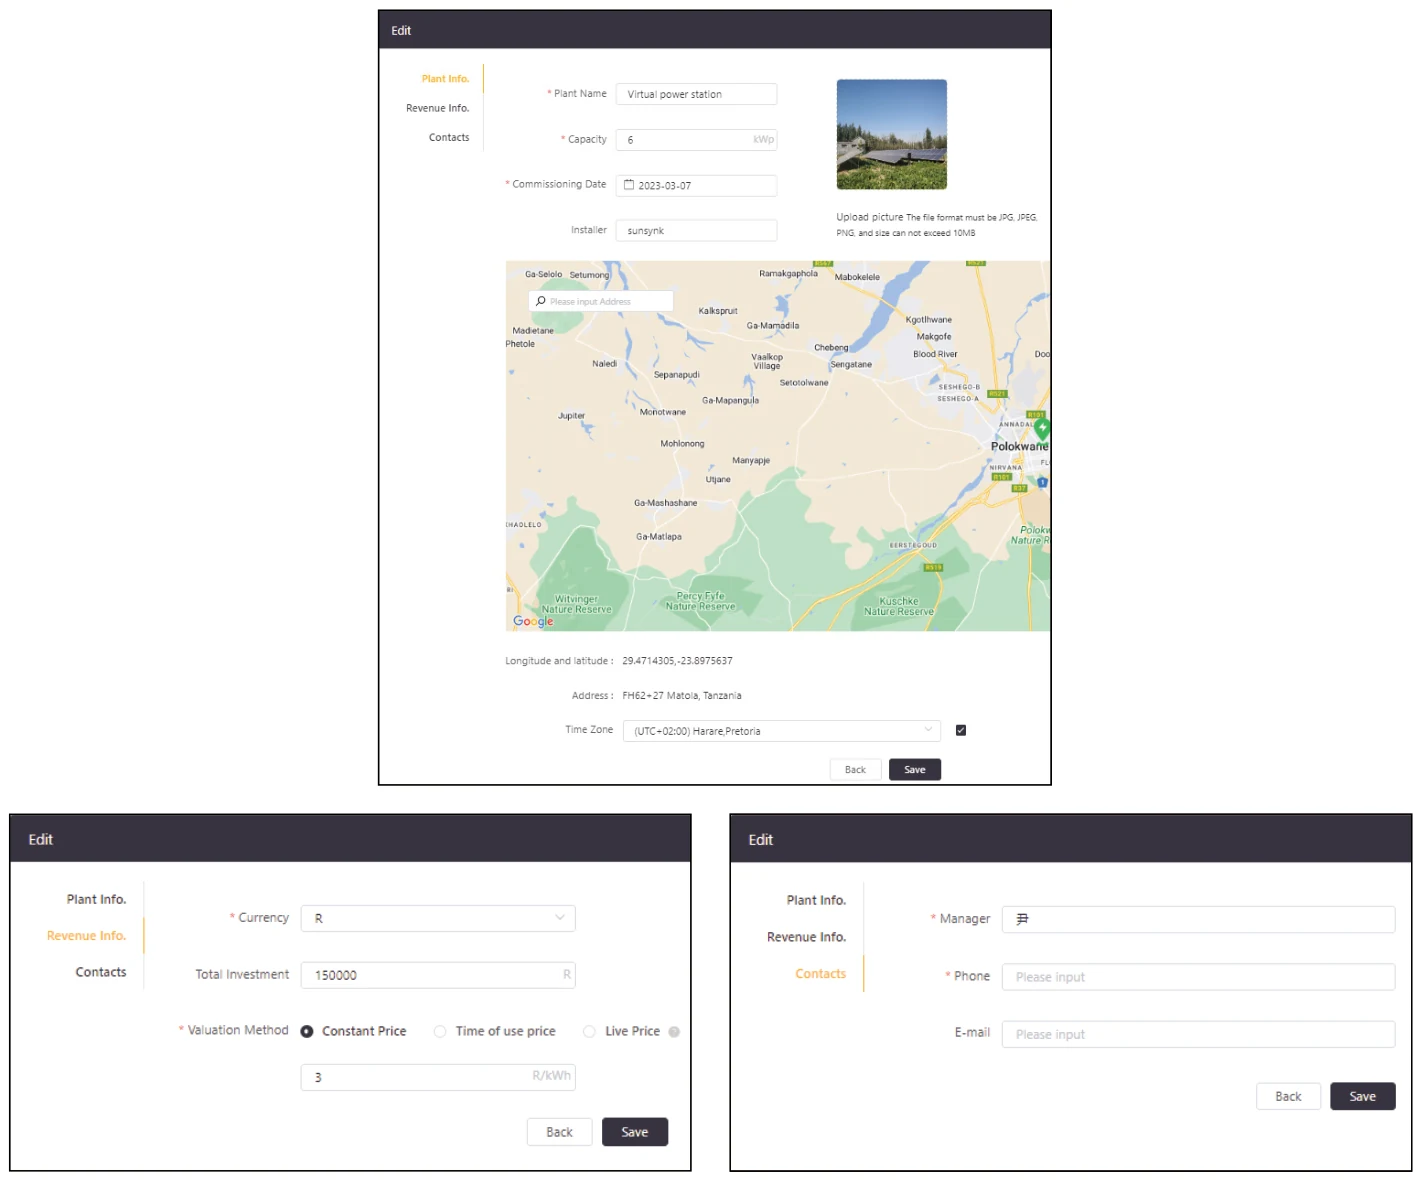
Enter the installation address of the plant in the address input box on the map to pinpoint the exact location, or use the map to select the correct installation site.
6
Verify and adjust the plant’s time zone if necessary. Click ‘Next’ to proceed.
4
Specify the total capacity in the ‘Capacity’ field and choose the appropriate ‘Plant Type’. Note that different types of plants will display different information on the page. To ensure accurate plant statistics, complete all required fields accurately.
7
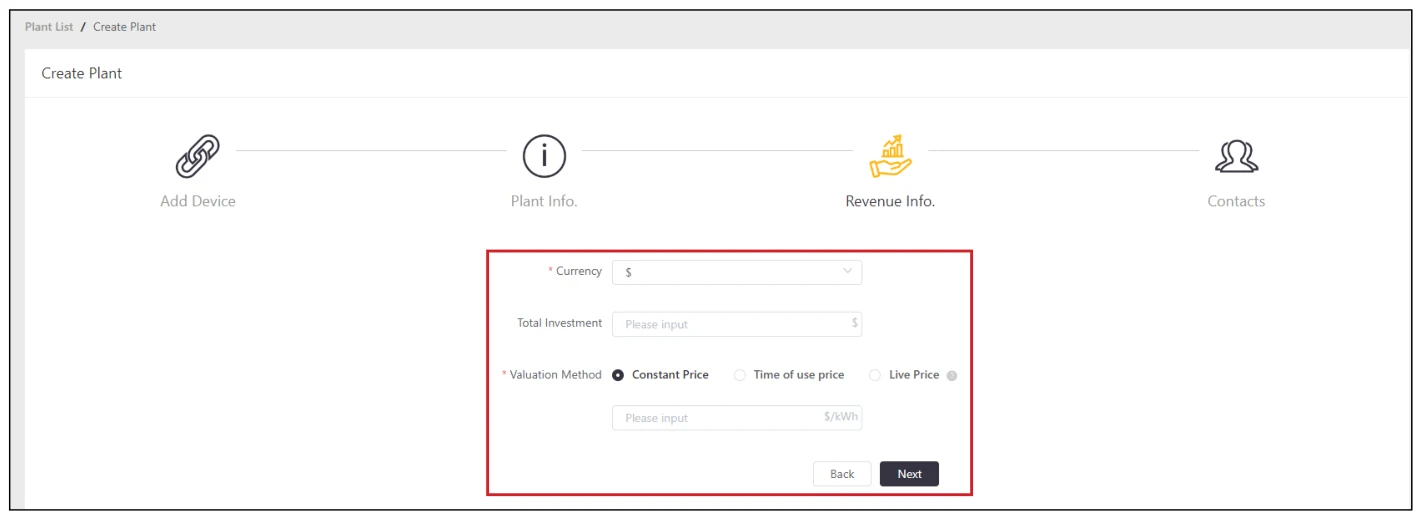
Select your currency, specify the total investment, and choose your preferred Valuation Method. Note: The Live Price option is currently available only for UK customers.
8
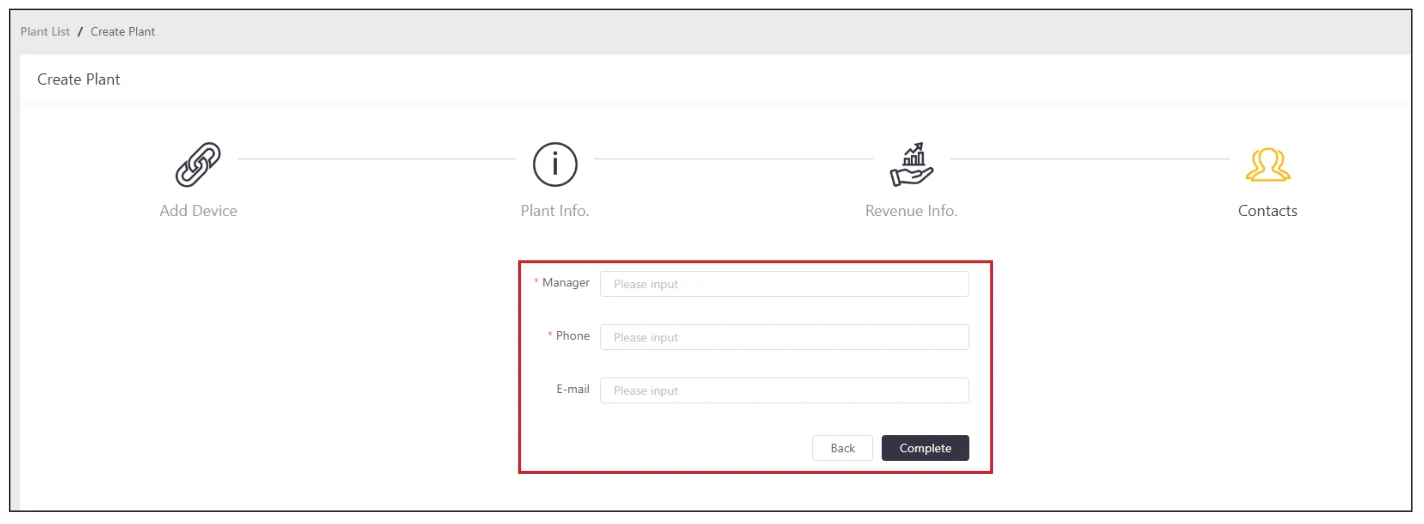
Provide the name, phone number, and email address of the user responsible for managing the system.
Adding a Device
3
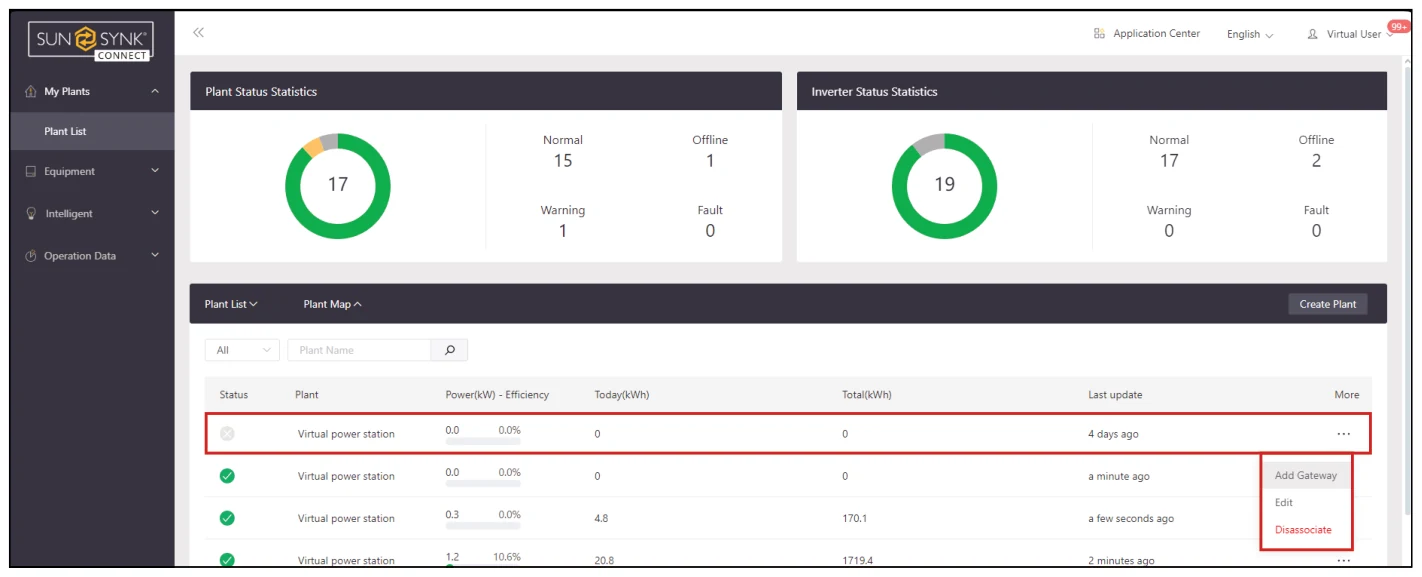
Click the ‘More (...)’ button and Select ‘Add Gateway’.
1
In the menu, first click ‘My Plant’, then ‘Plant List’.
2
Select the plant that need to add equipment from the ‘Plant List’.
4
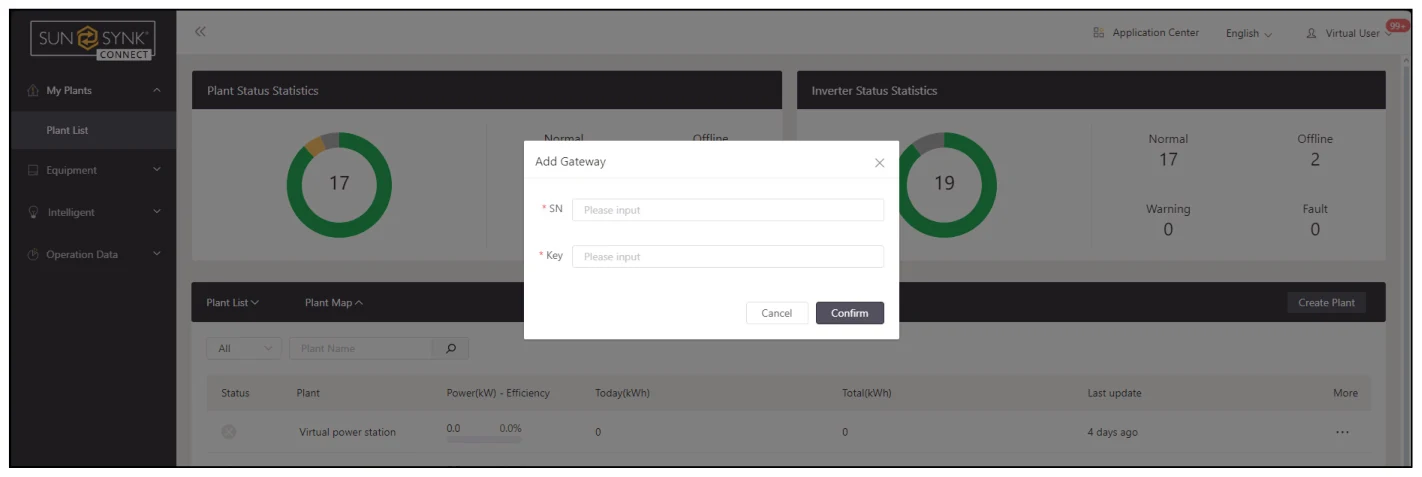
Input the serial number SN and key of the Data Logger to be connected, then click 'Confirm'.
Editing a Plant
3
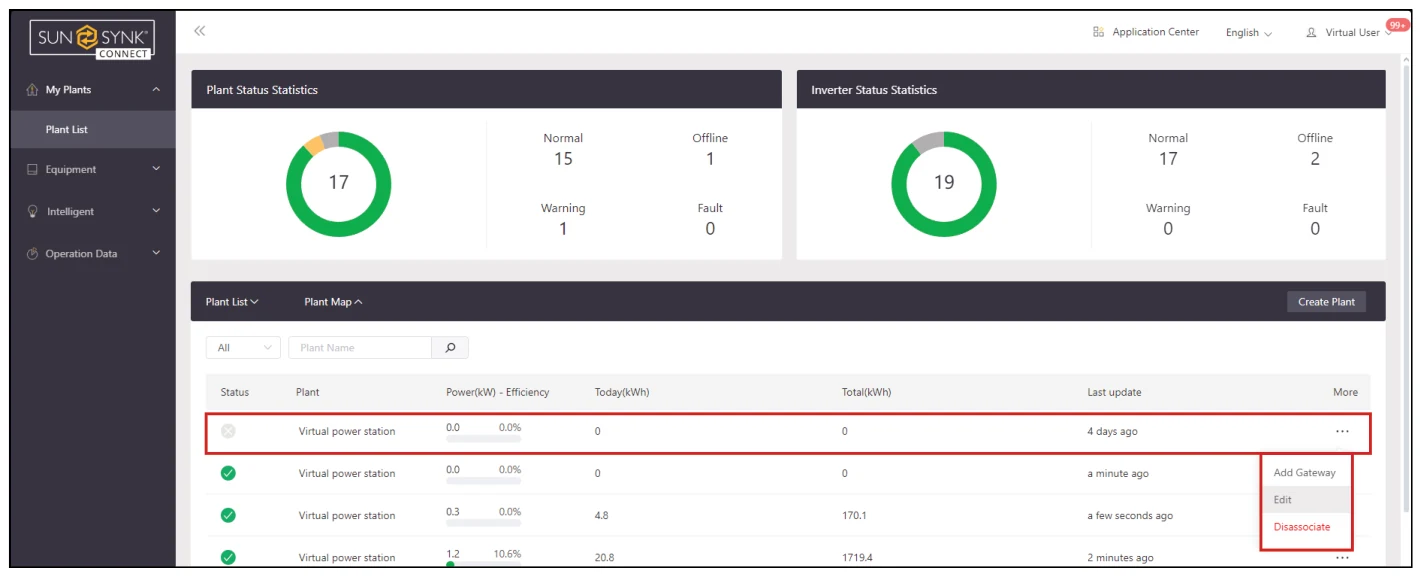
Click the ‘More (...)’ button and select ‘Edit’.
1
In the menu, first click ‘My Plant’, then ‘Plant List’.
2
Select the plant that need to be edited from the ‘Plant List’.
4
Review and make edits to any previously entered information as needed.
Plant Overview
1
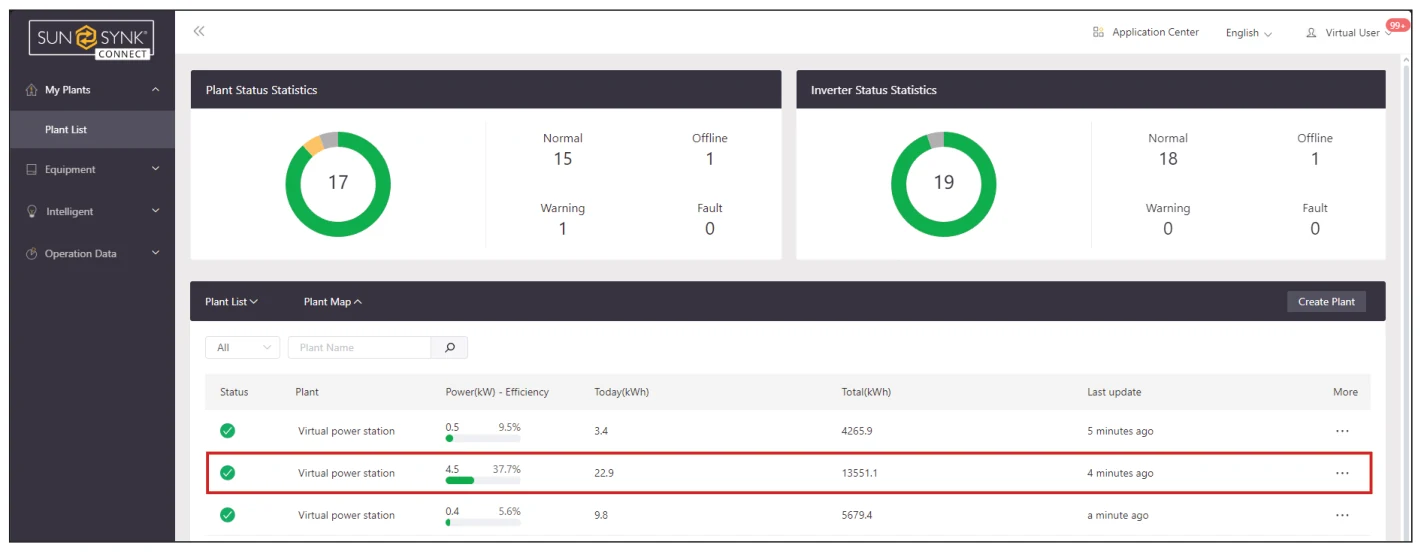
In the menu, first click ‘My Plant’, then ‘Plant List’.
2
Select plant list ‘Plant List’ and click the corresponding plant name to enter the plant Overview page.
3
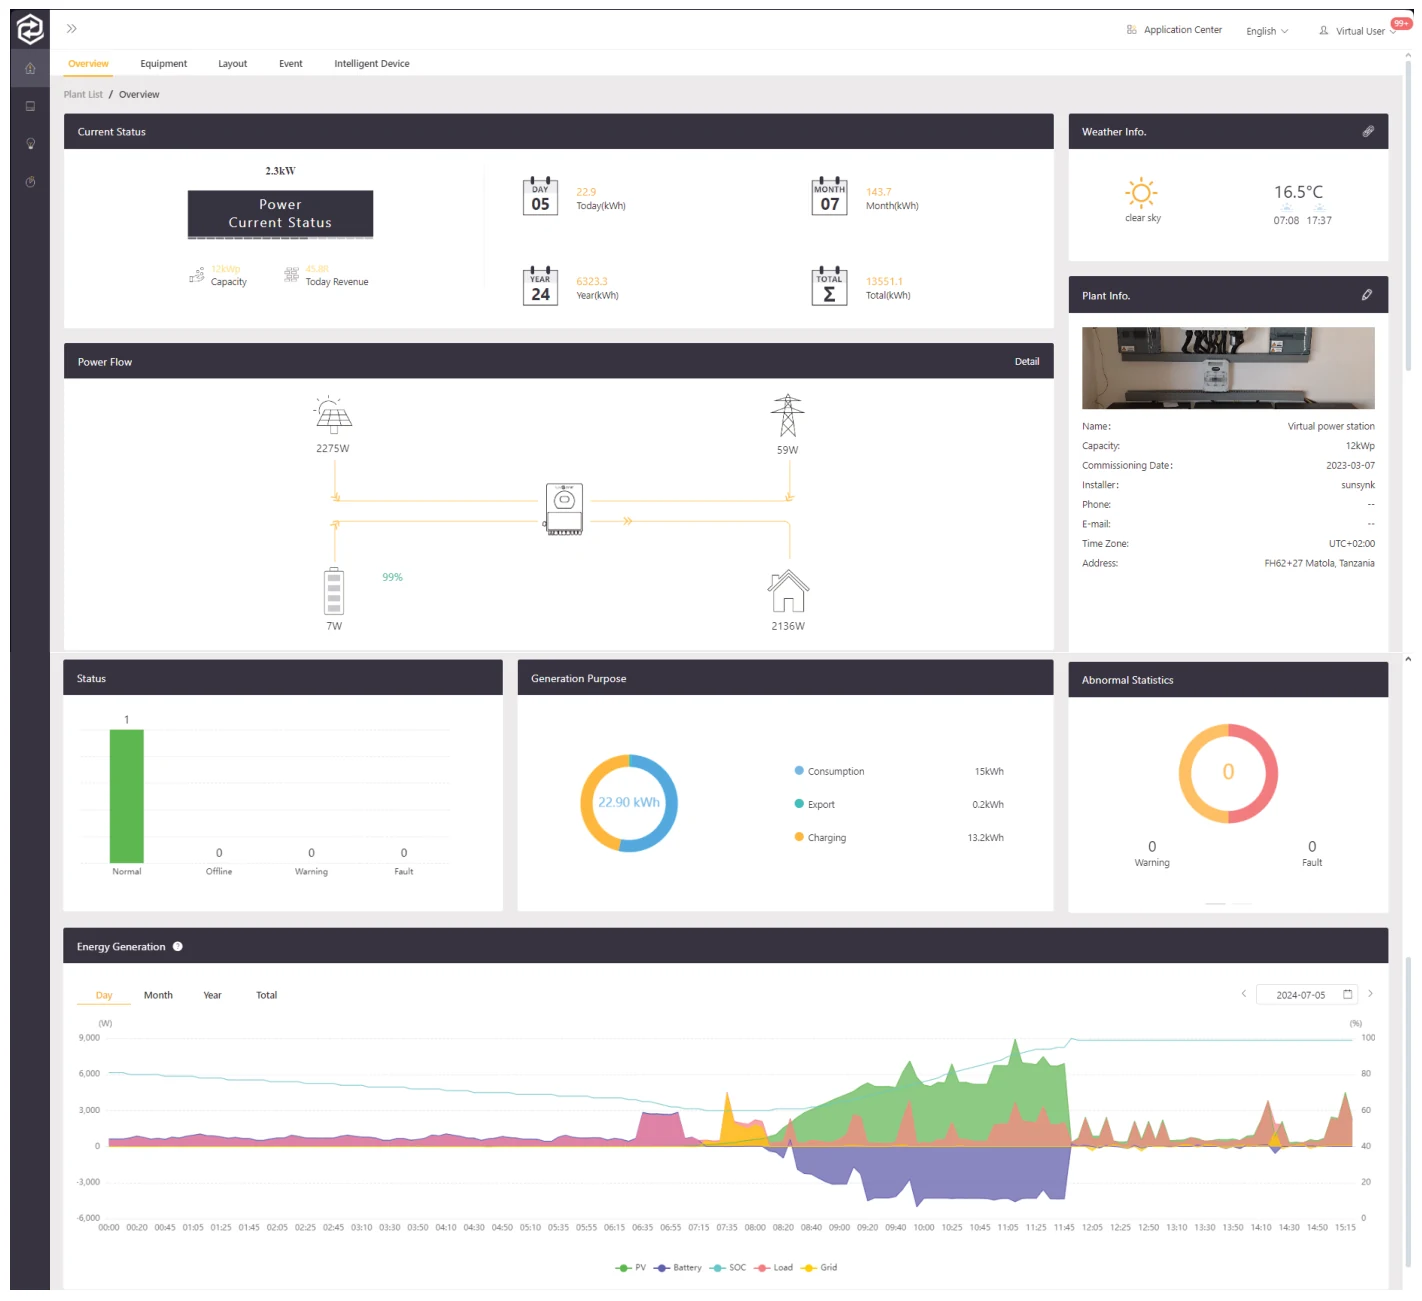
On the Plant Overview page, you can monitor the plant's status, weather conditions, energy flow diagram, inverter status, recent abnormalities, power generation charts, and other relevant information (as illustrated on the next page).
4
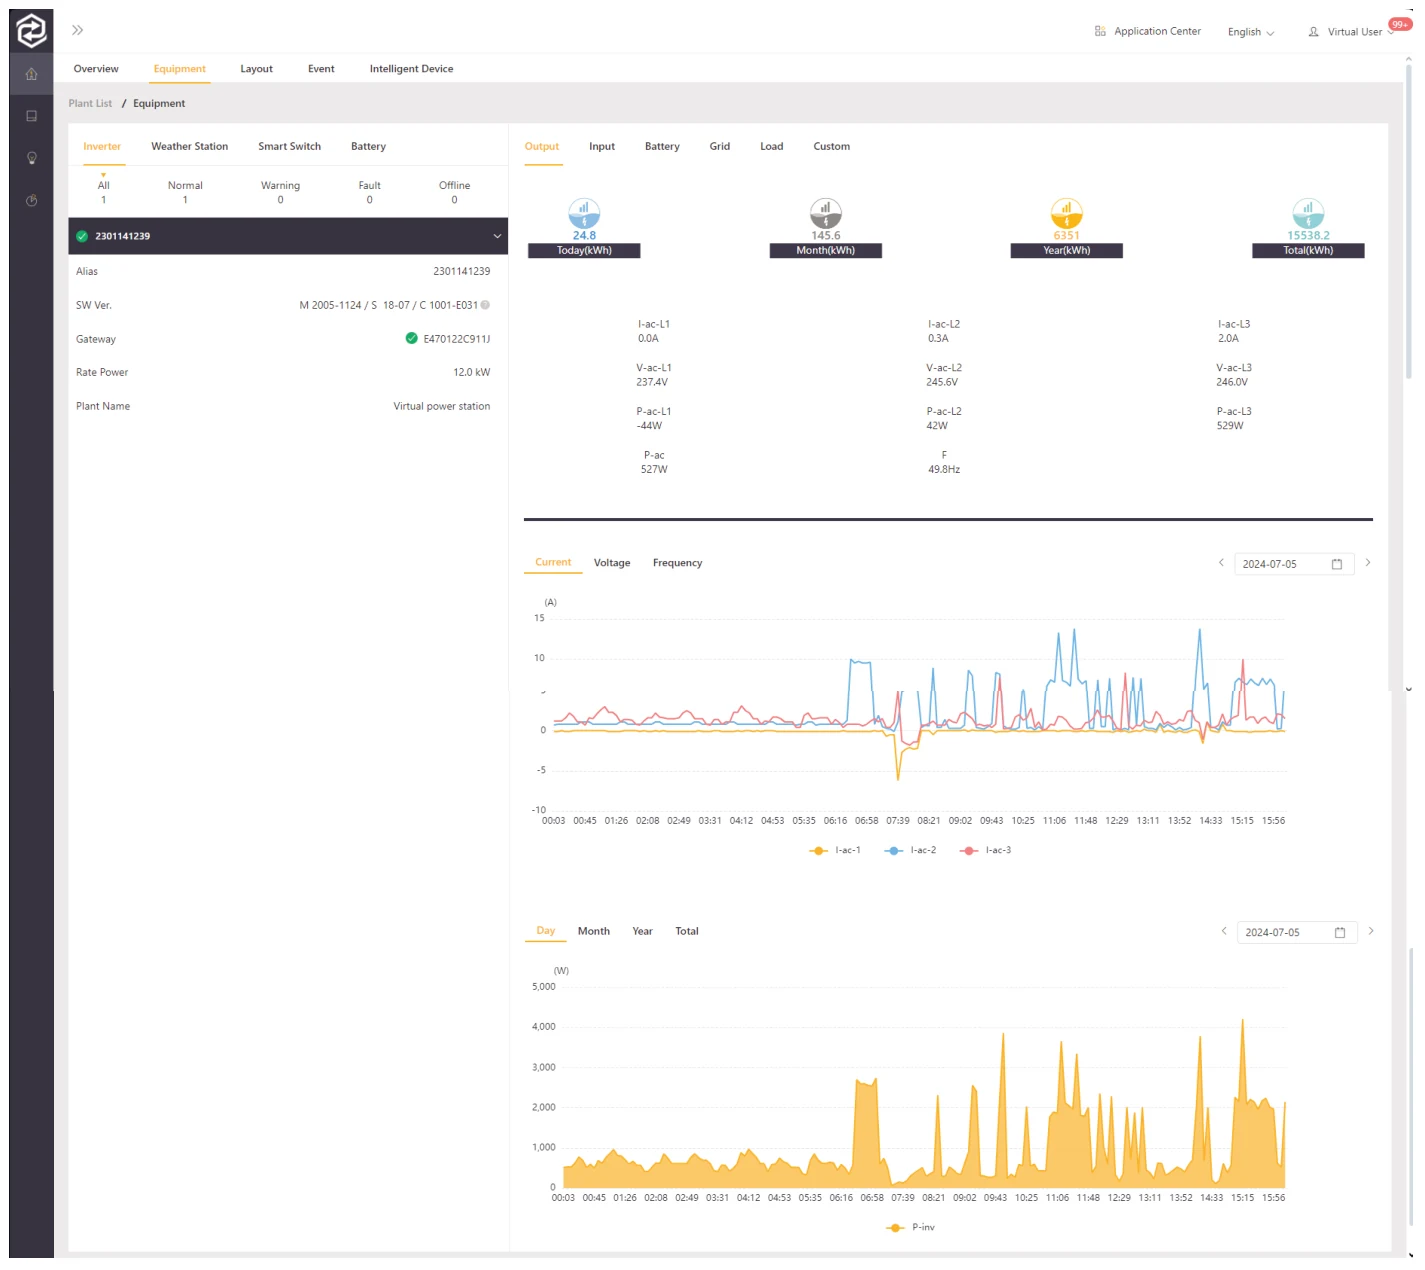
Click on ‘Equipment’ within the Overview page to access detailed information about all equipment installed in the plant. Here, you can view operational data charts, perform remote upgrades, adjust parameter settings, and manage other operations.
5
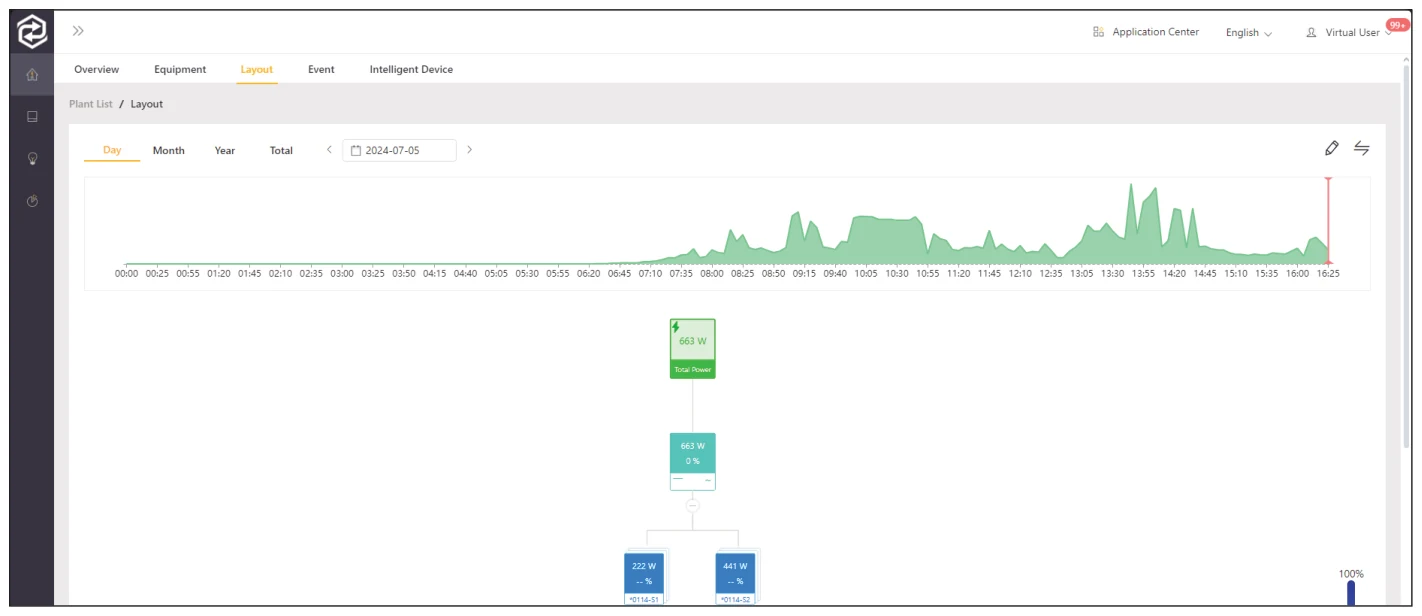
On the Plant Layout page, you can monitor the plant's layout.
6
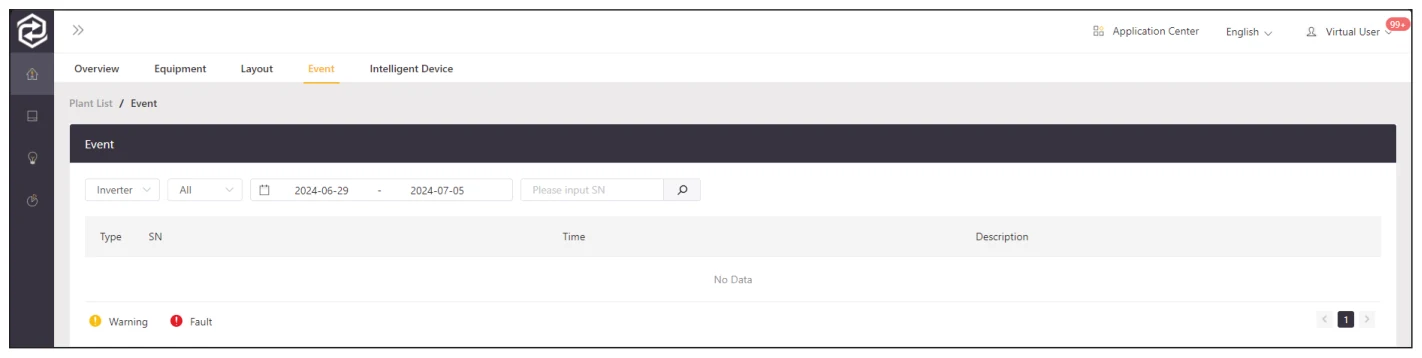
Navigate to the ‘Event’ menu on the Plant Overview page to switch to the Event page. Here you can view the current plants abnormal information.
7
On the Plant Intelligent device...

Battery Management
1
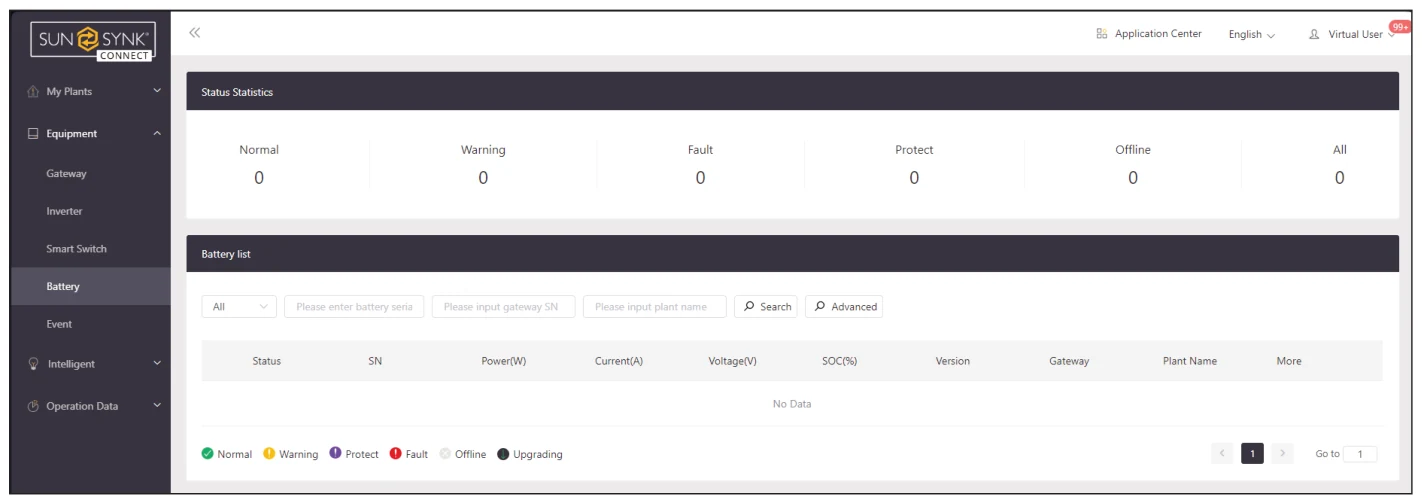
In the menu, click ‘Equipment’, then ‘Battery’ to enter the Battery List page.
On the Battery List page, click on the serial number (SN) of a battery to view its detailed information and operational data.
Event
1
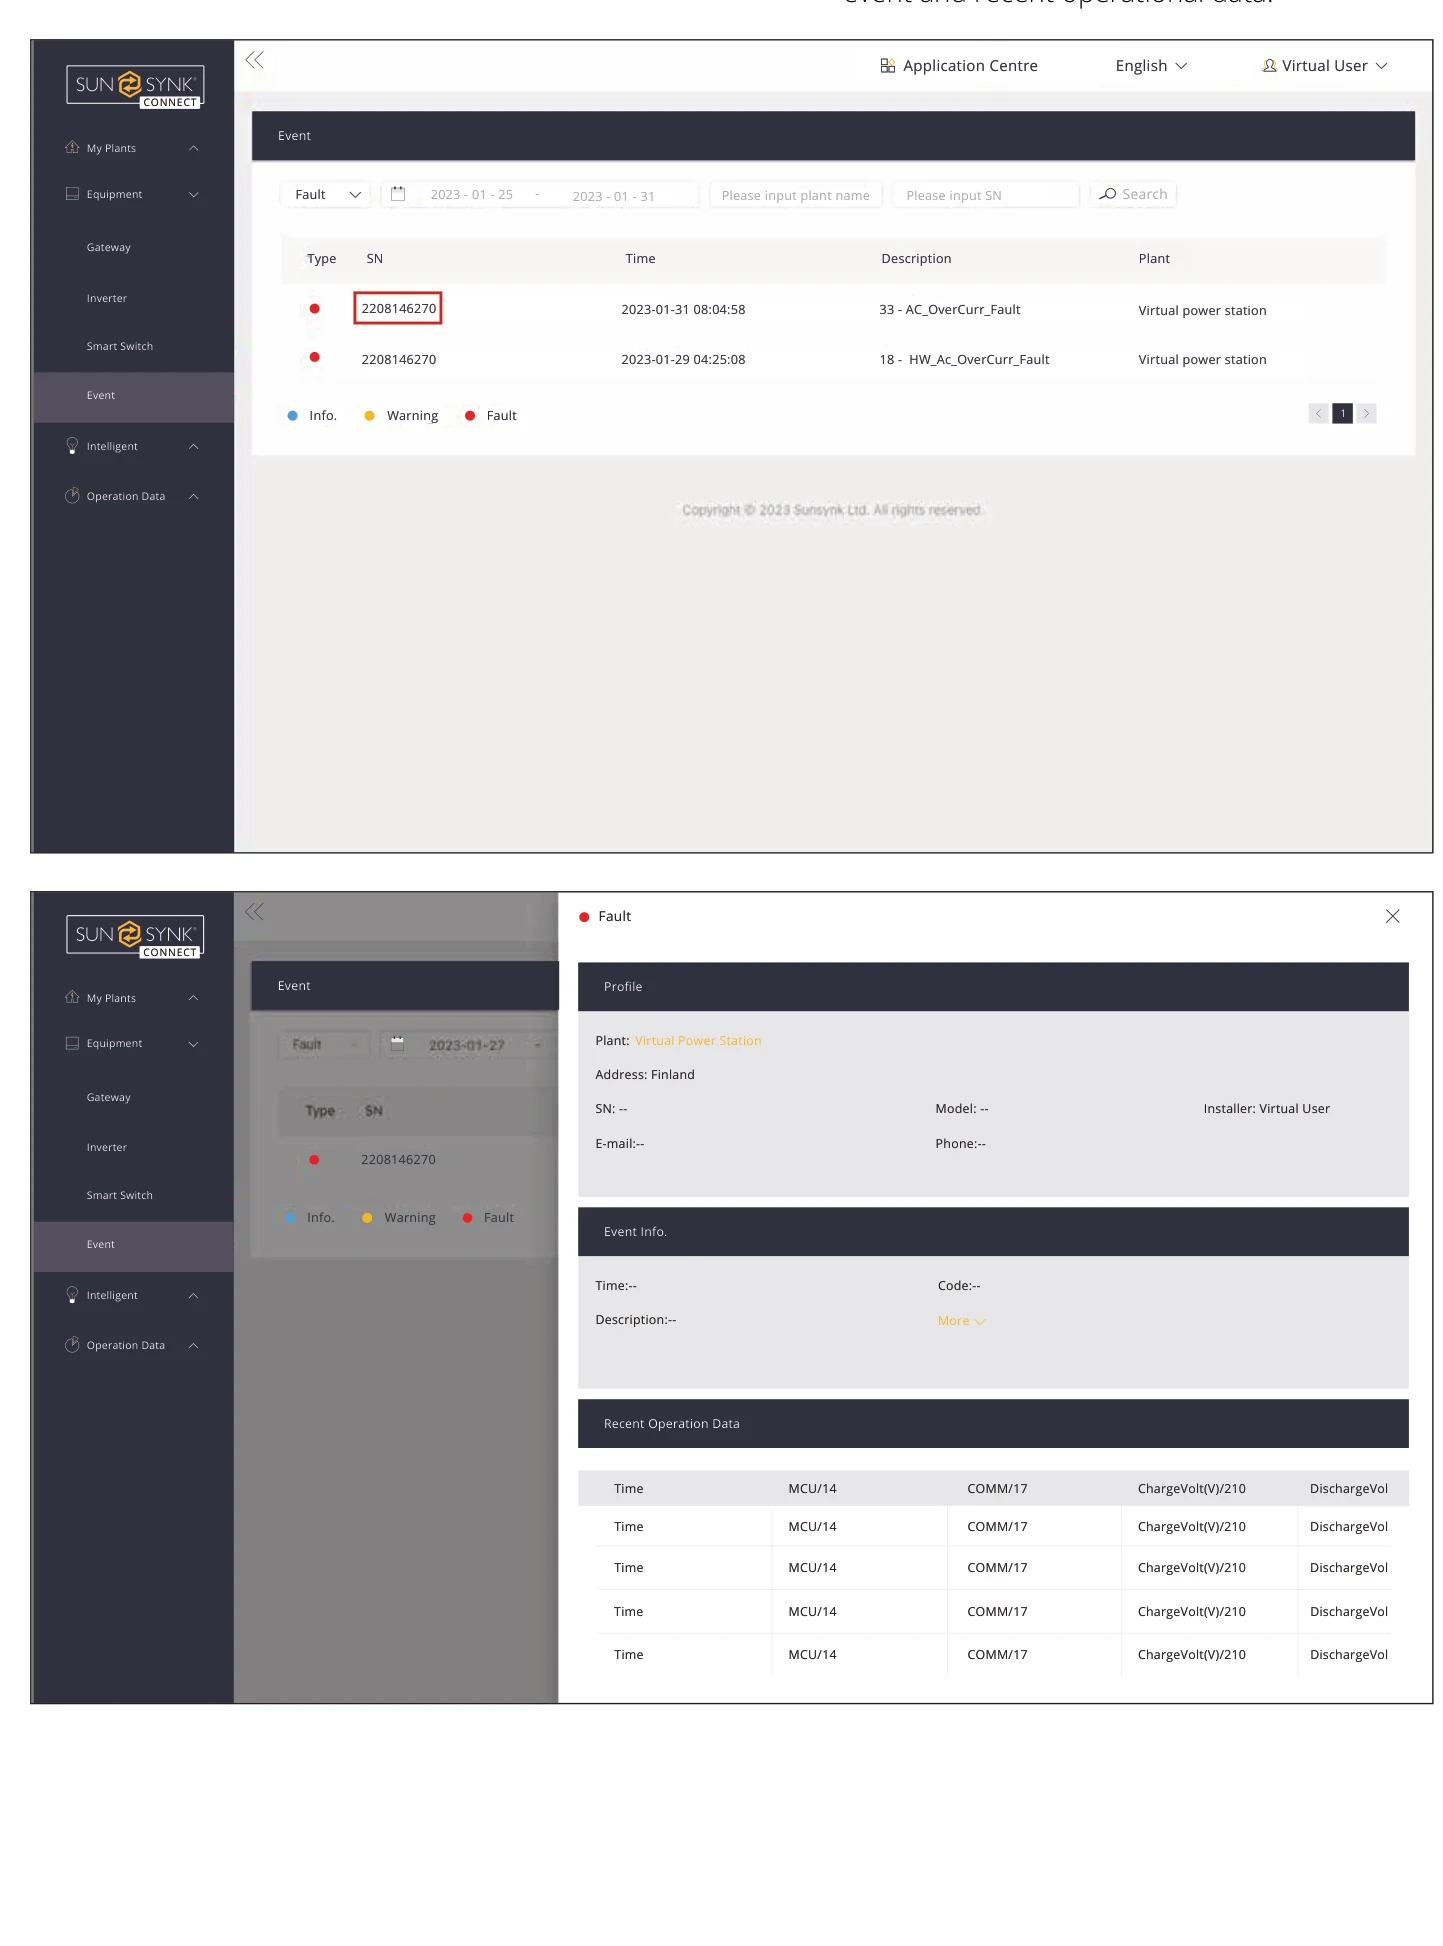
In the menu, click ‘Equipment’, then ‘Event’ to enter the Event List page.
2
In the Event List page, click on the SN of an inverter to view the detailed information of the event and recent operational data.